Welcome U Channel  Advanced Materials Technology (Shanghai) Co., Ltd
Single back hole

Back punched U-channel steel r62t

Back punched U-channel steel r62t

Product Introduction:

Surface treatment - hot dip galvanizing; pre galvanizing; electro galvanizing; stainless steel

Weight - 3.32kg/m (weight of U-groove on hot dip galvanized surface)

Thickness - 2.0 mm, 2.5 mm

Specification - 41mm × 62mm

Standard length - 3m or 6M


Product Parameters

R62T-25
 Uniform loadConcentrated loadAxial load

Horizontal support spacing

(mm)

Allowable compressive load and deflectionUltimate bearing capacity(Kg)Allowable compressive load and deflectionUltimate bearing capacity(Kg)

Center of gravity load(Kg)

Acting on surface load(Kg)

load

(Kg)

deflection

(mm)

load/

200

deflection/

360

load

(Kg)

deflection

(mm)

load/

200

deflection/

360

50016660.73166616668330.5883383360952642
10008332.918337954162.3241641641231787
15005556.545553532775.2227722031151350
200041611.623571982089.3020812325031085
250033318.1722912716614.49143792092907
300027726.121598813820.8299551797779


Product modelX-X axisY-Y axis
Ixx cm4Zxx cm3Rxx cmLyy cm4Zyy cm3Ryy cmArea cm2
R62T-2517.845.841.8213.116.351.823.95

L-moment of inertia, z-bending moment, r-radius of gyration, area of cross-section

Product Details

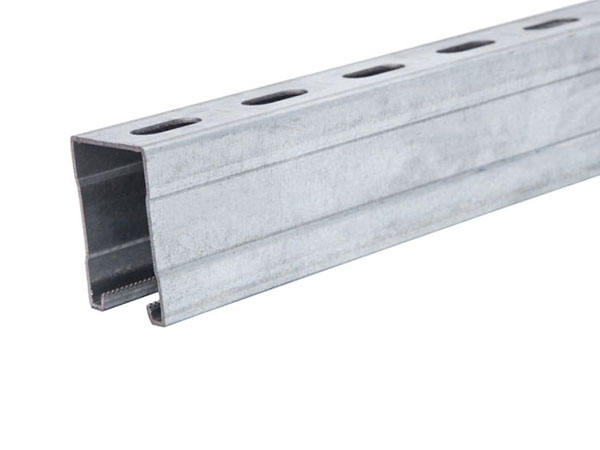
① U-shaped channel steel, as the foundation force member of support and hanger, can be configured with various parts to form a complete structural support system.

② Convenient for installation, maintenance and expansion of various pipes, cable trays and equipment.

③ The optimized cross-section design determines the high bearing capacity of U-shaped channel steel.

④ The tooth design of U-shaped channel steel inner edge makes the connection between channel steel and spring nut safer.

⑤ It can be connected with various structures such as wall, floor, ceiling, etc.

⑥ Various surface treatment can be used in different environments.


Installation:

① After the spring nut is rotated 90 degrees, move along the groove body to hold the nut in the desired position.

② Install the connection piece.

③ Connect other components.

④ Install torque according to spring nut requirements and tighten bolts.

5.png